If you have a soft spot for melt-in-your-mouth treats, you are going to adore this Danish Butter Cookies Recipe. These classic cookies are the perfect balance of rich, buttery flavor and delicate, crisp texture that simply dance on your tongue. They have that nostalgic feel of a cherished family recipe, perfect for sharing with loved ones or enjoying with a cozy cup of tea. This recipe is straightforward but delivers cookies with an authentic, buttery goodness that’s impossible to resist.
Ingredients You’ll Need
The beauty of this Danish Butter Cookies Recipe lies in its simplicity. Each ingredient plays an important role in creating that tender crumb and smooth, buttery taste that defines these little delights. From the creamy butter to the subtle sweetness of powdered sugar, every component is essential for a perfect batch.
- 1 cup unsalted butter, room temperature: Softened butter ensures a smooth dough and rich, creamy flavor.
- 1 cup powdered sugar: Powdered sugar blends seamlessly for a delicate sweetness and tender crumb.
- 1 teaspoon vanilla extract: Adds a warm, aromatic note that enhances the buttery richness.
- 1 3/4 cups flour: Provides structure to the cookies, giving them that perfect crisp bite.
- 1/4 cup cornstarch: Lightens the dough for a tender, melt-in-your-mouth texture.
How to Make Danish Butter Cookies Recipe
Step 1: Cream the Butter and Sugar
Start by adding the softened butter and powdered sugar to your stand mixer on the lowest speed setting just until combined. Then crank the mixer up to medium-high and cream them together for a full five minutes until the mixture turns pale and fluffy. This step is crucial for creating the light texture you’re aiming for in these cookies.
Step 2: Add Vanilla
Next, pour in the vanilla extract and beat for about 10 seconds. This small addition brings out a lovely depth of flavor that complements the buttery base perfectly.
Step 3: Incorporate the Dry Ingredients
Lower the mixer speed to the lowest setting, then gradually add the flour and cornstarch in spoonfuls. Be careful not to overbeat here—you want just enough mixing for everything to come together into a soft dough without developing gluten, which can make the cookies tough.
Step 4: Shape the Cookies
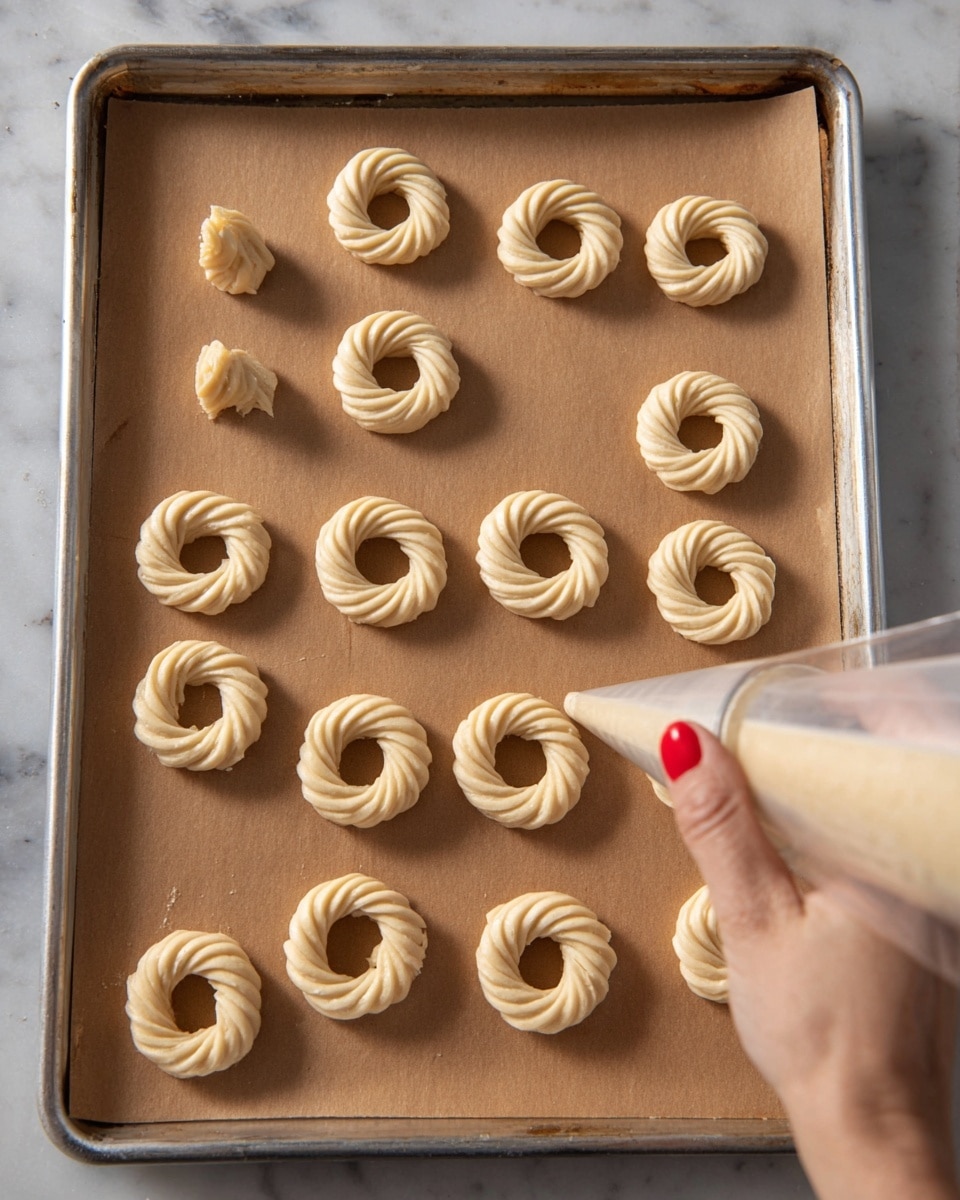
Transfer the dough into a piping bag fitted with a #1M piping tip. On parchment-lined baking sheets, pipe the dough into 2-inch circles. These pretty rounds will bake into the signature shape and size that everyone loves.
Step 5: Chill and Sprinkle
Sprinkle coarse sanding sugar over each cookie for a sparkling finish and a slight crunch. Then refrigerate the baking sheets for 30 minutes so the dough firms up, which helps the cookies hold their shape during baking.
Step 6: Bake to Perfection
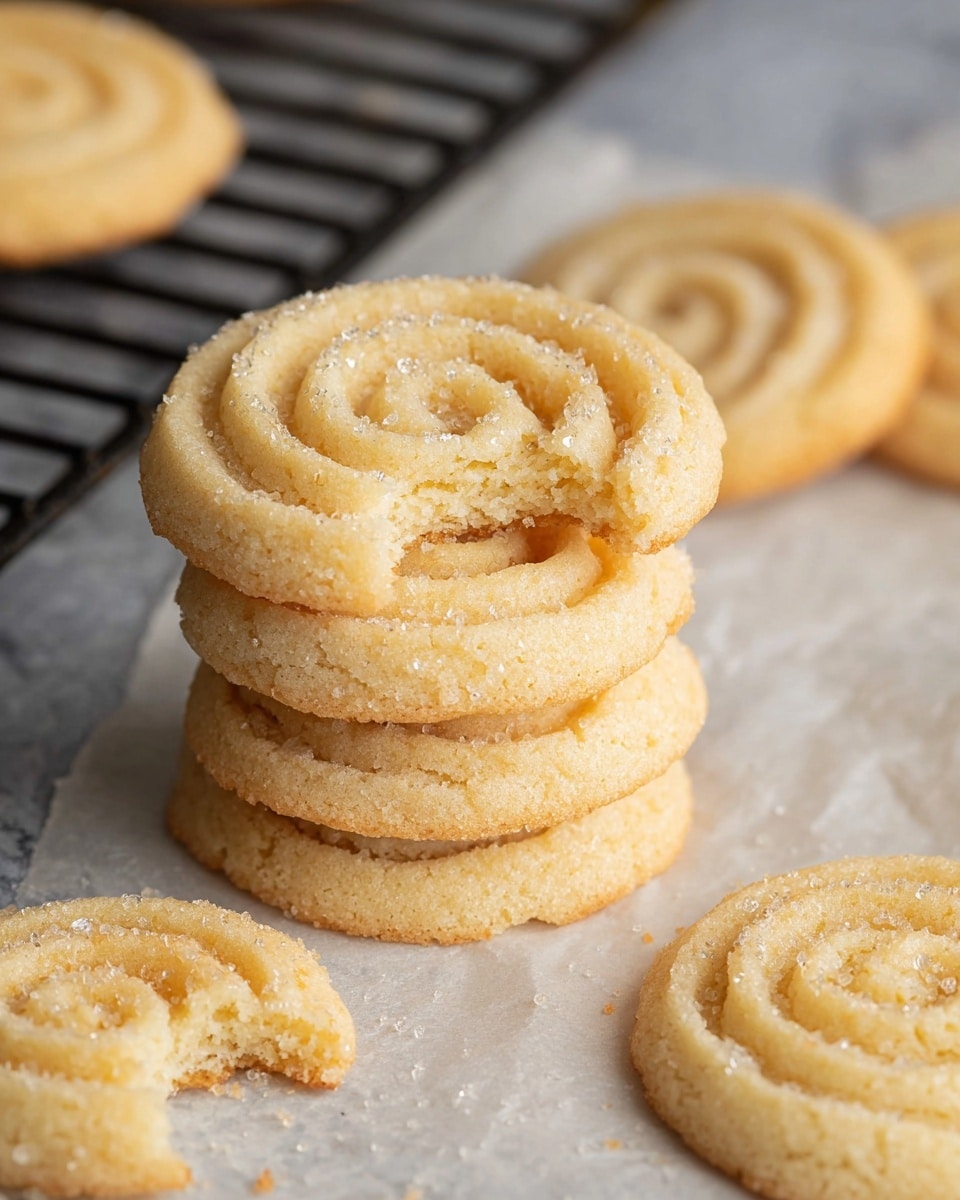
Preheat your oven to 325 degrees Fahrenheit. Bake the cookies for 11 to 13 minutes until their edges just begin to turn a light golden brown. The cookies should be crisp on the outside, tender and buttery inside—that classic Danish Butter Cookies Recipe texture.
How to Serve Danish Butter Cookies Recipe
Garnishes
While these cookies are delightful on their own, a light dusting of powdered sugar right before serving can add an extra touch of elegance and sweetness. For a festive twist, you can also sprinkle a tiny amount of colored sanding sugar or add a small drizzle of melted chocolate for contrast.
Side Dishes
Danish butter cookies pair beautifully with warm beverages. A robust cup of black coffee or a comforting mug of tea complements their buttery flavor perfectly, balancing sweetness with a slight bitterness. You could also serve them alongside fresh fruit or a scoop of vanilla ice cream for a simple yet impressive dessert platter.
Creative Ways to Present
Presentation is half the fun! For that charming “Grandma’s kitchen” vibe, arrange your cookies in a classic metal cookie tin. Alternatively, stack them on a pretty cake stand or place them in small parchment paper bags tied with ribbon for a thoughtful homemade gift. This Danish Butter Cookies Recipe looks just as delightful as it tastes!
Make Ahead and Storage
Storing Leftovers
Leftover cookies can be stored in an airtight container at room temperature for up to a week. Keeping them sealed helps preserve their crispness and buttery flavor without drying out.
Freezing
You can freeze these Danish butter cookies by layering them between sheets of parchment paper in an airtight container or freezer bag. Frozen cookies will keep their freshness for up to three months, making it easy to enjoy them anytime a craving strikes.
Reheating
To refresh the cookies, let them come to room temperature naturally. If you prefer them slightly warm, pop them in a preheated oven at 300 degrees Fahrenheit for 5 minutes—just enough to bring back that fresh-from-the-oven softness without overbaking.
FAQs
Can I substitute all-purpose flour with gluten-free flour in this recipe?
Yes, you can try a gluten-free all-purpose blend, but results may vary slightly in texture. It’s ideal to use a blend with xanthan gum for better structure, and avoid overmixing to keep the cookies tender.
Why is the dough chilled before baking?
Chilling the dough helps solidify the butter, which prevents the cookies from spreading too much during baking and helps maintain their signature shape and texture.
Can I use salted butter instead of unsalted?
It’s best to use unsalted butter so you can control the exact amount of salt in the recipe. If using salted butter, omit any additional salt and consider reducing it slightly, as salted butter can vary in salt content.
How long do the Danish butter cookies stay fresh?
Stored properly in an airtight container, these cookies stay fresh for up to one week. Beyond that, they might start to lose their crispness but should still taste delicious.
Is it possible to add flavors or mix-ins to the recipe?
Absolutely! You can mix in finely chopped nuts, a pinch of cinnamon, or even some lemon zest for a twist. Just keep in mind that the classic Danish Butter Cookies Recipe shines in its simplicity, so subtle additions work best.
Final Thoughts
There’s something truly special about baking a batch of Danish Butter Cookies Recipe from scratch and sharing them with the people you love. This recipe is delightfully simple yet creates cookies that taste like a treasured family secret. I hope you enjoy making and eating these buttery little joys as much as I do—they’re sure to become a beloved part of your baking repertoire!
PrintDanish Butter Cookies Recipe
This classic Danish Butter Cookies recipe delivers rich, buttery cookies with a tender crumb and a delicate balance of sweetness. Perfect for festive occasions or a comforting treat, these cookies are made by creaming butter and sugar, then gently folding in flour and cornstarch. Piped into elegant shapes and baked to a light golden edge, they can be enjoyed fresh or stored in a tin for weeks of delicious snacking.
- Prep Time: 40 minutes
- Cook Time: 13 minutes
- Total Time: 53 minutes
- Yield: 15 cookies
- Category: Dessert
- Method: Baking
- Cuisine: American
Ingredients
Cookie Dough
- 1 cup unsalted butter, room temperature
- 1 cup powdered sugar
- 1 teaspoon vanilla extract
- 1 3/4 cups all-purpose flour
- 1/4 cup cornstarch
Topping
- Coarse sanding sugar, for sprinkling
Instructions
- Cream Butter and Sugar: Add the unsalted butter and powdered sugar to your stand mixer on the lowest speed setting and mix until just combined to avoid scattering the sugar.
- Whip for Fluffiness: Increase the mixer speed to medium-high and cream the mixture for a full 5 minutes until it becomes very pale and fluffy, which creates the light texture of the cookies.
- Add Vanilla: Pour in the vanilla extract and beat for an additional 10 seconds to evenly incorporate the flavor.
- Incorporate Dry Ingredients: Lower the mixer to the lowest speed and gradually add the flour and cornstarch in spoonfuls. Mix until just combined to avoid overworking the dough, which could toughen the cookies.
- Pipe the Dough: Transfer the cookie dough to a piping bag fitted with a #1M piping tip. Prepare a baking sheet lined with parchment paper.
- Shape and Sugar: Pipe the dough into 2-inch circles on the prepared baking sheet, then sprinkle each cookie lightly with coarse sanding sugar for a sparkling finish.
- Chill: Refrigerate the baking sheets with the piped cookies for 30 minutes to firm up the dough, helping the cookies keep their shape during baking.
- Preheat Oven: While chilling, preheat your oven to 325°F (163°C) to ensure it is at the right temperature for gentle baking.
- Bake: Bake the cookies for 11-13 minutes, or until the edges just start to brown slightly, indicating they are perfectly cooked without being overdone.
- Serve or Store: For authentic presentation and freshness, serve the cookies in a metal cookie tin. They can also be stored in the tin to keep them crisp and fresh for weeks.
Notes
- Room temperature butter is essential for achieving the right creamy texture.
- Do not overmix once the flour and cornstarch are added to prevent tough cookies.
- Chilling the dough is important to maintain cookie shape and texture during baking.
- Using coarse sanding sugar adds a delicate crunch and pretty finish.
- Store cookies in an airtight metal tin for best freshness.


