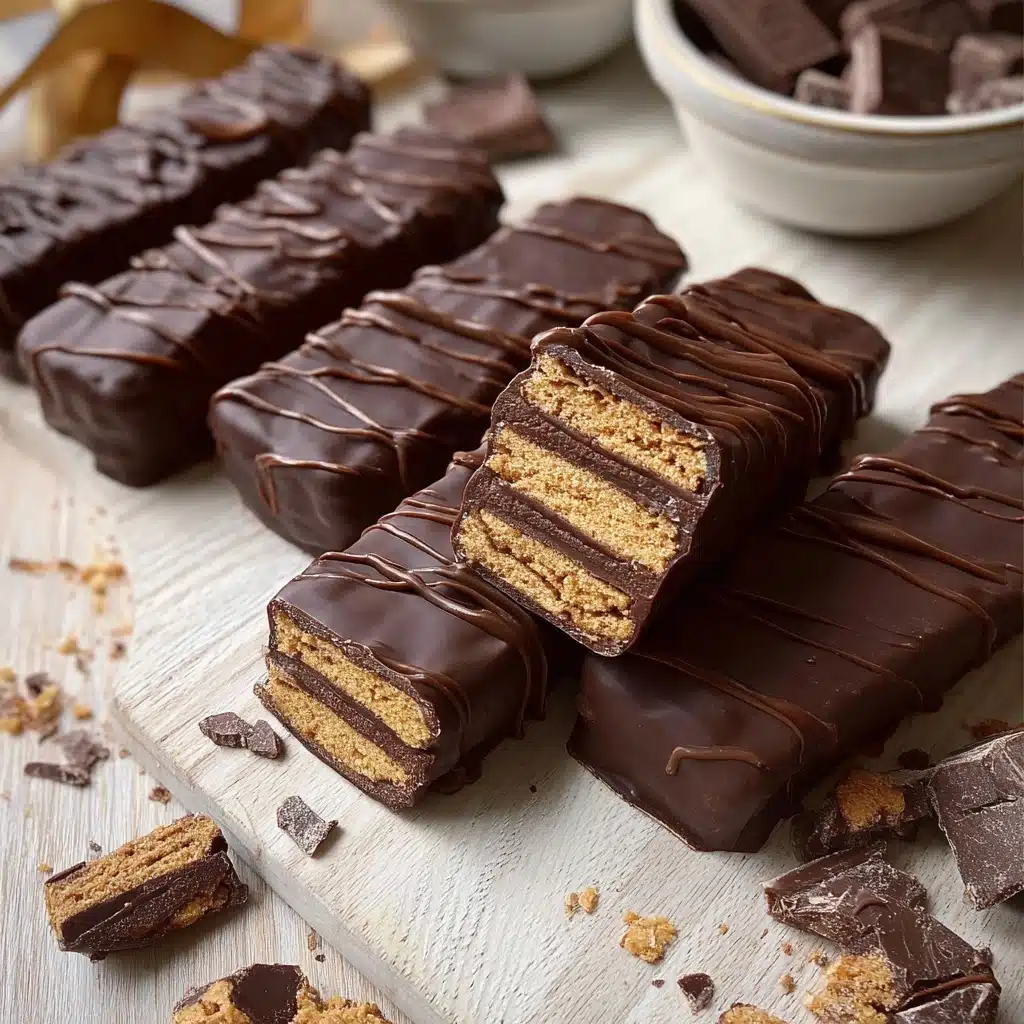
This Healthy Kit Kat Recipe (Gluten Free, Vegan) is about to become your new snack obsession. Imagine the CRISP of a classic Kit Kat, but built from wholesome pantry staples and entirely plant-based. With tender homemade cookie layers, a dreamy chocolate-peanut fudge center, and that all-important snappy dark chocolate shell, this treat is a knockout in both flavor and nutrition. You won’t believe how easy it is to create that iconic texture and taste with just a handful of simple, gluten free, and vegan ingredients—all while skipping the processed stuff. Prepare to wow your friends (and yourself!) with this irresistible, allergy-friendly twist.
Ingredients You’ll Need
What makes this Healthy Kit Kat Recipe (Gluten Free, Vegan) so special is just how straightforward and wholesome the ingredient list is—no mystery ingredients, just pure flavor and function. Each component brings something essential: structure, flavor, crunch, or a gourmet finishing touch.
- Blanched almond flour: Delivers a tender crunch and a slight nutty flavor, while keeping things gluten free (tigernut flour works if you need nut free!)
- Coconut sugar: Adds a gentle caramel sweetness and lovely golden hue without refined sugar.
- Ground flax: Binds the cookies together in place of eggs and sneaks in a nutritional boost.
- Salt: A pinch sharpens all the flavors and balances the sweetness perfectly.
- Melted coconut oil: Gives the cookies that crave-worthy melt-in-your-mouth crumb.
- Water: Brings the dough together without heaviness.
- Vanilla extract: Lends a bakery-worthy aroma that makes every bite nostalgic.
- Dark chocolate (for filling): Ensures a rich, fudgy layer between each crunchy cookie.
- Peanut butter (or Sunbutter): Amps up the creamy, nutty depth for the irresistible fudge center.
- Dark chocolate (for coating): The final layer—smooth and snappy, just like the real thing.
- Coconut oil (for coating): Keeps the chocolate glossy and perfectly dippable.
How to Make Healthy Kit Kat Recipe (Gluten Free, Vegan)
Step 1: Mix the Cookie Dough
Start by preheating your oven to 350 degrees F. In a medium bowl, blend all the dry cookie ingredients—almond flour (or tigernut flour), coconut sugar, ground flax, and salt. Give them a good stir so everything is evenly combined. Next, pour in the melted coconut oil, water, and vanilla. Use a spatula to incorporate, then get hands-on and knead the dough until it comes together. It should feel soft, like playdough—never sticky or crumbly.
Step 2: Roll and Shape
Sandwich the dough between two pieces of parchment paper, then roll it out to about 1/8-inch thickness. Don’t worry if it isn’t a perfect rectangle—just aim for even thickness so your Kit Kats bake up nice and uniform. Use a sharp knife or pizza cutter to trim the dough into classic Kit Kat rectangles: about 3.5 inches long and 0.75 inches wide. Set aside any leftover scraps to re-roll for a few more cookies.
Step 3: Bake the Cookies
Slide the parchment (with cookie bars still on it) onto a baking sheet and bake at 350 degrees for 8–10 minutes. You’re looking for a slight golden color along the edges. Once they’re done, gently separate the cookies with a knife if any have melded together, and let them rest for 5–10 minutes on the pan—this prevents breaking. Afterward, transfer to a wire cooling rack and let them cool completely. Resist the urge to nibble! They’ll firm up as they cool for the perfect crunch.
Step 4: Make the Fudge Filling
Melt the dark chocolate gently (either in a microwave-safe bowl in short bursts or on the stovetop), then stir in the peanut butter or Sunbutter until the mixture is glossy and thick—almost like a spreadable frosting. Let the fudge cool for about 10 minutes so it firms up just enough to spread neatly. Layer two cookies with fudge, then top with a third cookie for a classic three-tier effect. Set each assembled Kit Kat on a parchment-lined pan, ready for its chocolate bath.
Step 5: Freeze and Dip
Place the tray of assembled bars in the freezer for about 15 minutes. This helps them firm up and makes the chocolate coating process a breeze. For the chocolate shell, melt dark chocolate with coconut oil in a small saucepan on low heat, stirring often until silky smooth. Remove the cookies from the freezer, then dip each one into the melted chocolate, using a fork to let the excess drip off for a tidy finish. Set each bar back on the parchment. Drizzle any remaining chocolate over them for those signature wavy stripes!
How to Serve Healthy Kit Kat Recipe (Gluten Free, Vegan)
Garnishes
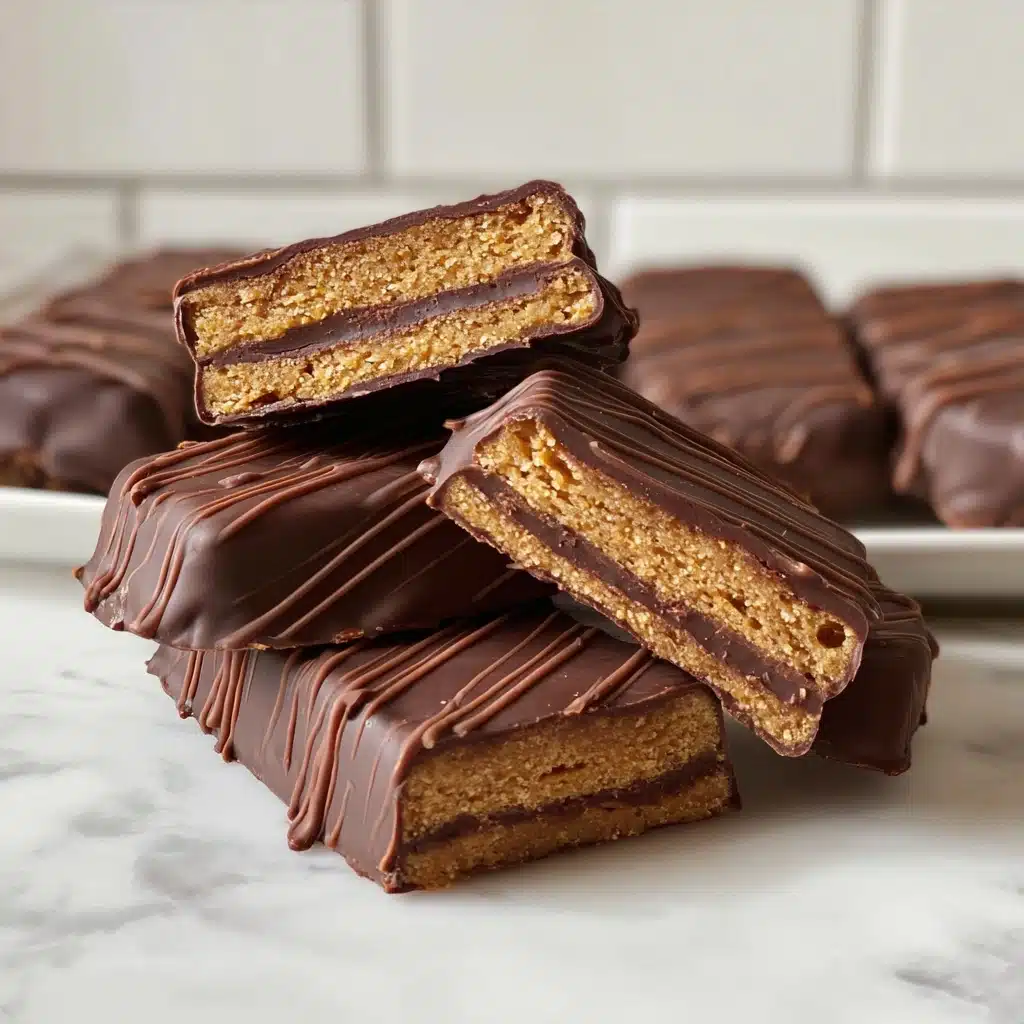
Make your homemade Kit Kats look bakery-ready with a light dusting of flaky sea salt, a scattering of freeze-dried raspberry powder, or a sprinkle of finely chopped nuts for extra flair. A simple chocolate drizzle is classic, but feel free to get playful with your toppings! Each garnish adds a different twist on the “wow” factor and satisfies all your textural cravings.
Side Dishes
These bars are an undeniable star on a dessert platter. For a delightful afternoon treat, pair them with a glass of plant-based milk, an oat milk latte, or a piping hot cup of green tea. They also shine alongside fresh fruit, like juicy strawberries or tart apple slices, for a balanced, crowd-pleasing snack plate.
Creative Ways to Present
Channel your inner pastry chef! Stack these Kit Kat lookalikes in a glass jar as an edible gift, or arrange them on a marble board for an instant show-stopper at brunches, picnics, or movie nights. You can even wrap individual bars with waxed paper and twine for a nostalgic lunchbox surprise. This Healthy Kit Kat Recipe (Gluten Free, Vegan) always sparks conversation—prepare for recipe requests!
Make Ahead and Storage
Storing Leftovers
Any uneaten Kit Kat bars should be stored in an airtight container. They’ll happily hang out at room temperature for up to three days, or in the fridge for a week or more. The chocolate stays crisp, and the cookie stays satisfyingly crunchy!
Freezing
If you’d like to save your Healthy Kit Kat Recipe (Gluten Free, Vegan) for later, freezing is a smart move. Once the chocolate coating is fully set, place bars in a single layer (or separate with parchment) in a freezer-safe box. They’ll keep up to 2 months—just let them thaw for a few minutes before enjoying for best flavor and crunch.
Reheating
There’s really no need to reheat these treats, since they taste best chilled or at room temp. If you’ve frozen them and want to soften them a bit, just let the bars rest at room temperature for about 15–20 minutes before eating. Avoid microwaving, since it will melt the chocolate shell and change the texture.
FAQs
Can I make this recipe completely nut-free?
Absolutely! Swap out the almond flour for tigernut flour, and use Sunbutter instead of peanut butter for the fudge filling. Every other ingredient is naturally nut-free, so the whole batch can be enjoyed by those with nut allergies.
Will coconut sugar make these bars taste like coconut?
Nope! Coconut sugar has a mild, caramel-like taste that blends seamlessly into baked goods. It won’t make your bars taste like coconut, especially with the stronger notes of dark chocolate and vanilla in the mix.
Can I use another type of gluten free flour in the cookies?
The best results come from almond or tigernut flour in terms of texture and flavor. Some other gluten free flours might work, but results can be unpredictable—almond and tigernut are naturally a bit sweet and provide the “snap” you expect from a Kit Kat.
How do I get perfectly smooth chocolate coating?
The secret is to melt your chocolate and coconut oil slowly over low heat. Make sure your bars are well chilled before dipping, and let any excess chocolate drip off for a uniform coating. If you want pro-level shine, try dipping twice—the extra layer makes them look just like store-bought Kit Kats!
Can I double or triple this Healthy Kit Kat Recipe (Gluten Free, Vegan)?
Yes! This recipe is easy to scale up for parties or holiday treats. Just multiply the ingredients, and make sure to chill assembled bars in a single layer so they set evenly before coating in chocolate.
Final Thoughts
Once you try this Healthy Kit Kat Recipe (Gluten Free, Vegan), you’ll never look at store-bought bars the same way. With that signature snap and real-deal chocolate flavor, these homemade treats are a total joy to make and even better to share. Trust me—your sweet tooth will thank you!
PrintHealthy Kit Kat Recipe (Gluten Free, Vegan) Recipe
Indulge in these homemade Healthy Kit Kat bars that are gluten-free and vegan-friendly. With a crunchy cookie base, a creamy fudge filling, and a rich chocolate coating, this treat is a guilt-free delight for any occasion.
- Prep Time: 40 minutes
- Cook Time: 8 minutes
- Total Time: 48 minutes
- Yield: 11-12 Kit Kat Bars
- Category: Dessert
- Method: Baking
- Cuisine: American
- Diet: Gluten Free
Ingredients
Cookies:
- 1 1/4 cup blanched almond flour (or tigernut flour) (115g)
- 3 Tbsp coconut sugar
- 1 Tbsp ground flax**
- 1/8 tsp salt
- 3 Tbsp melted coconut oil
- 1 Tbsp water
- 1 tsp vanilla extract
Fudge Filling:
- 2 Tbsp dark chocolate
- 3 Tbsp peanut butter (or Sunbutter)
Chocolate Coating:
- 1 cup dark chocolate (5oz)
- 1/2 Tbsp coconut oil
Instructions
- Cookies: Preheat oven to 350 degrees F. Combine all dry cookie ingredients. Mix in wet ingredients. Roll dough, cut into rectangles, bake, and cool.
- Fudge Filling: Melt dark chocolate, stir in peanut butter, cool, spread on cookies, assemble, and freeze.
- Chocolate Coating: Melt dark chocolate and coconut oil, dip cookies, let set, and drizzle any remaining chocolate.
Notes
- *Substitute tigernut flour for a nut-free version.
- **Grind whole flax seeds in a coffee grinder to make ground flax.
Nutrition
- Serving Size: 1 Kit Kat Bar
- Calories: Approx. 150 kcal
- Sugar: Approx. 5g
- Sodium: Approx. 30mg
- Fat: Approx. 10g
- Saturated Fat: Approx. 5g
- Unsaturated Fat: Approx. 5g
- Trans Fat: 0g
- Carbohydrates: Approx. 15g
- Fiber: Approx. 3g
- Protein: Approx. 3g
- Cholesterol: 0mg


